
Shopify Theme Customization
Customizing a Shopify theme is the optimal approach to create a visually appealing online store, even if you lack coding expertise. By utilizing Shopify themes, you can avoid the arduous and time-consuming task of designing your eCommerce store from scratch, which also requires significant effort and financial investment.
Shopify themes provide a foundational appearance that aligns with the specific niche of your eCommerce store. Once you have chosen a theme, the next crucial step is to customize it according to your unique storefront requirements.
However, before diving into customization, it is essential to select the most suitable theme for your Shopify store. Let’s explore the process of choosing the ideal theme that caters to your specific eCommerce needs.
Read More : Developing a marketing plan For Shopify
Preparing to Customize Your Shopify Theme
Firstly, there are two primary methods for customize your Shopify theme:
1. customize using the theme editor
2. Utilize other page builder
Additionally, remember to make a duplicate of your theme prior to making any customizations. This will allow you to easily revert back to the original version if needed.
If you have already reached the limit of 20 themes in your Shopify admin, you must delete one before adding another.
To duplicate your theme:
1. Access your Shopify admin panel.
2. Navigate to Online Store > Themes.
3. Find the theme you wish to duplicate – if it is your current theme, it will be listed under Current theme, otherwise it will be in your Theme library.
4. Click on Actions > Duplicate.
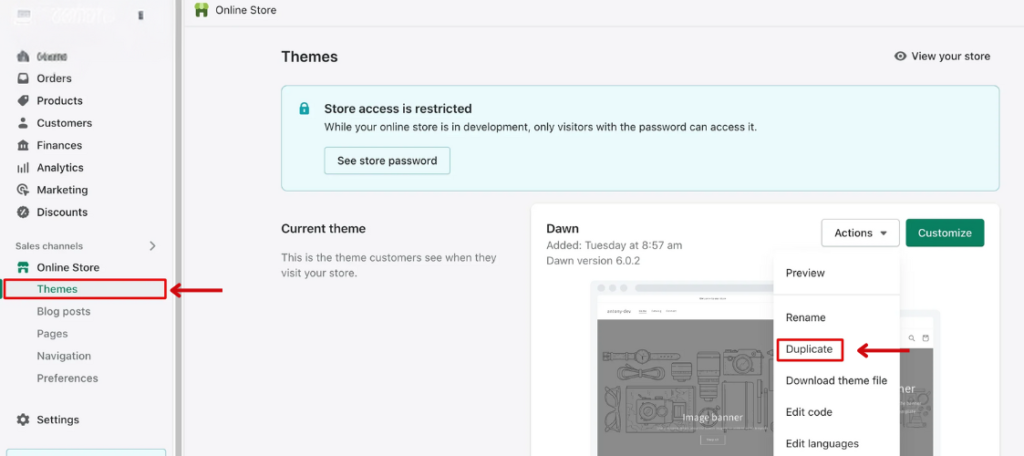
The duplicate theme will be visible on the Themes page and will be named as Copy Of + the original theme’s name.
Read More : Top 10 Shopify Benefits You Should Know
How to Customize Your Shopify Theme in The Theme Editor?
When utilizing the Shopify theme editor to customize your pages, you are actually customizing the page templates instead of the specific pages. This implies that any modifications made to a specific template will be reflected across all pages utilizing that template.
You have the ability to customize your online store’s content, layout, typography, and colors. Every theme offers sections and settings that enable you to alter the appearance of your store without the need to interact with or view any code.
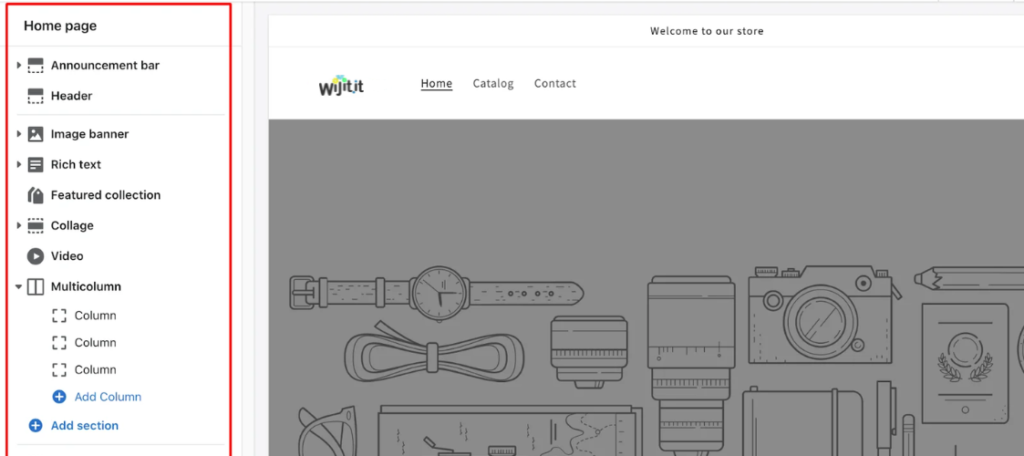
There are multiple sections within the page layout, with some being fixed and others being movable. The Header and Footer sections are fixed and will always be visible on the page, with their positions being unchangeable.
The remaining sections on the page will display two icons on the right side: the eye icon and the kebab menu icon. The appearance of these sections on your page is dependent on your settings, and you have the option to relocate them between the Header and Footer to suit your preferences.
1. Customize The Announcement Bar and Header Section
Announcement
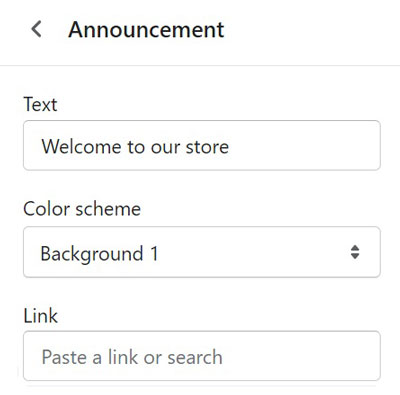
The announcement bar serves as a platform to showcase crucial details regarding your business, such as ongoing promotions, shipping delays, or updated policies.
Nevertheless, it’s important to note that not all themes come equipped with a pre-installed announcement bar. In the case of other Shopify themes, you may need to download a third-party application to incorporate an announcement bar into your website.
Fortunately, the Dawn theme offers an announcement bar as a default feature, allowing you to customize various aspects including the text, color option, and links.
Read More : Why Voice Commerce Is the Future of eCommerce?
Header section
- Color Scheme – The color scheme for your header, including background and font colour, can be adjusted in the theme settings.
- Logo Image – This is where you upload your site’s logo.
- Custom Logo Width – Use the slider to adjust the width of your logo.
- Desktop Logo Position – Select the position of your logo from the drop-down menu.
- Menu – Choose the menu you want for your main menu.
- Desktop Menu Type – Select from a dropdown or mega menu, with options for line spacers and sticky header.
- Spacing – Set the margin between your header and the content on your pages.
The settings you choose for the header will be applied to your entire site, ensuring consistency across your homepage and product pages. Keep in mind that some options may vary depending on the theme you are using.
2. Edit Individual Sections
Proceed to scroll down in order to personalize additional sections such as the image banner, rich text, featured collections, collages, videos, and multicolumn.
Each of these segments offers various customization choices. Simply click on a section to access the menu of modifications available.
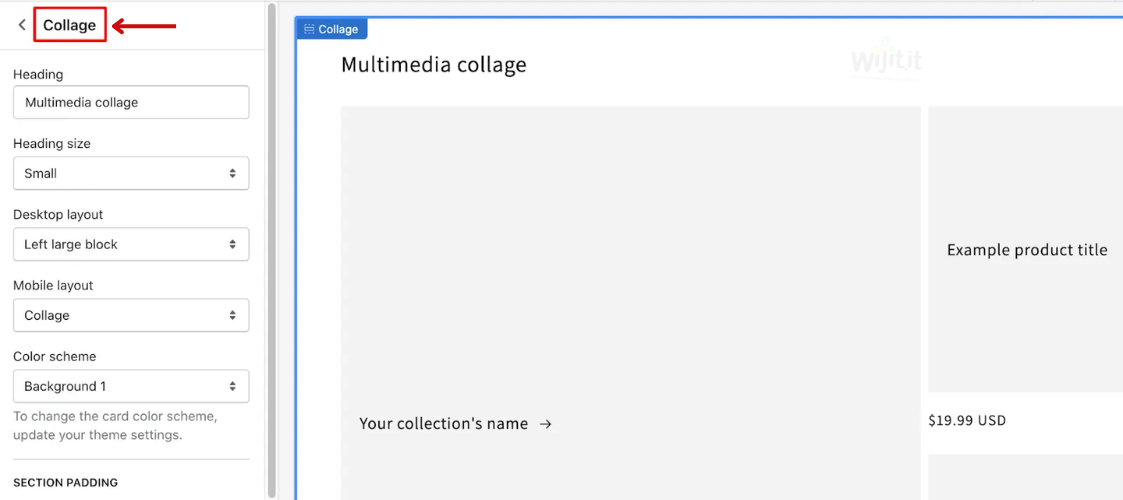
In the Collage section, you have the ability to select the collection to display and the product to highlight.
Add a section
To add a new section, simply click on the blue button labeled Add Section. From there, you can choose a section from the list or search for a specific term using the search bar. Remember, the newly-added section can be rearranged on your page, moving either up or down, and doesn’t have to remain directly above the footer.
Move a section
To rearrange a section on your page, simply hover your mouse over the kebab menu. Once your mouse pointer transforms into a white glove, click and drag the icon to move the section.
Remove a section
To delete a section, simply left-click on the desired section and select the recycle bin icon located at the bottom.
Read More : Top 10 Upselling and Cross-Selling Strategies to Drive Revenue
3. Customize The Footer Section
Similar to the header, any modifications made to the footer section will be reflected throughout your entire store. Certainly, the extent of customization available will vary based on the theme you have selected. Below are a few examples of elements you can adjust in your footer with the Dawn theme:
- Color scheme
- Email signup visibility
- Social media icons
- Country/Region selector
- Payment method icons visibility
- Spacing and padding
4. Adjust Shopify Theme Settings
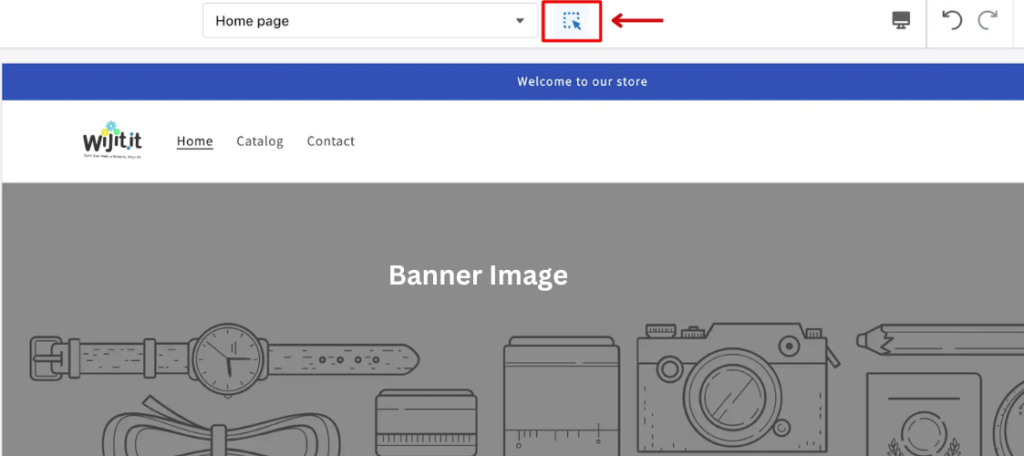
You have the option to modify your theme’s overall appearance and settings in the Shopify theme editor. To access your theme settings, simply click on the brush icon labeled “Theme settings” located in the left corner of your screen.
This will prompt the Shopify customization menu to appear.
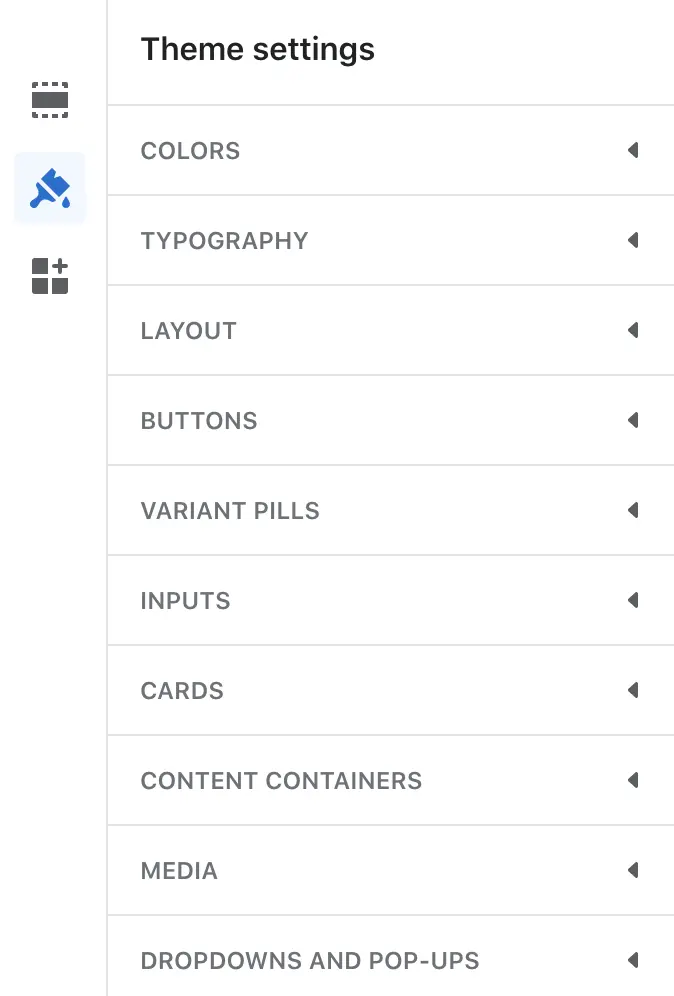
Of course, the range of customization choices is contingent upon the theme you have selected. However, there are several options that are commonly available in the majority of Shopify themes.
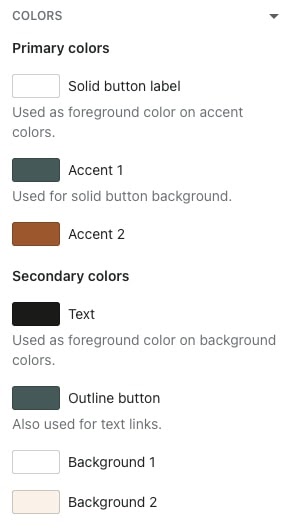
- Colors: Change your color scheme for elements like backgrounds, buttons, text, and accents.
- Typography: Choose the fonts that work best for your store.
- Layout: Adjust page width, space, and grid.
- Buttons: Determine how your buttons look by customizing their border and width.
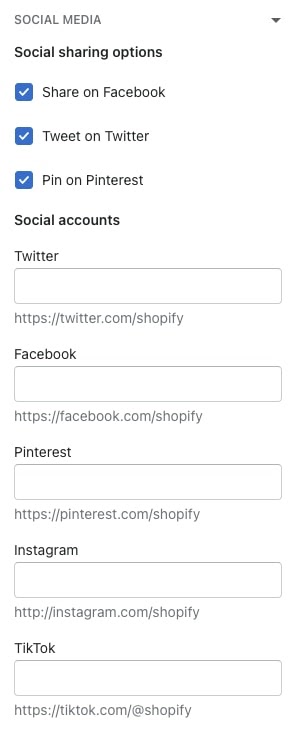
- Social Media: Add links to your social accounts.
- Favicon: Upload your favicon image.
- Cart: Define your cart type—drawer, page, or popup notification.
- Checkout: Change the layout and design of your checkout page
By customizing sections and theme settings using the theme editor, you are introducing fresh elements to the standard Shopify theme. This marks the initial stage in enhancing your storefront.